Are you setting up a water transport in plants experiment where you want children to see the flowers to change color? This type of investigation can be an effective visual but can also lead to frustration and disappointment if the flowers stay the same.
This blog post will give you some tips for setting up this type of science investigation, and help you plan for success! I set this experiment with some different variables to see which gave the most dramatic result…
Ox-eye daisies with felt-tip pen
I chose the ox-eye daisy (the tall type) as there were loads of them growing on a footpath behind my house. I cut the stems so they were around 4 inches long. After adding an inch of water to jam jars, I then popped a washable felt tip pen, nib down, in the water. The water changed color quickly. I left the flowers overnight.
VERDICT: This is the easiest, least messy of the set-ups I tried and gave visible results over 24 hours.
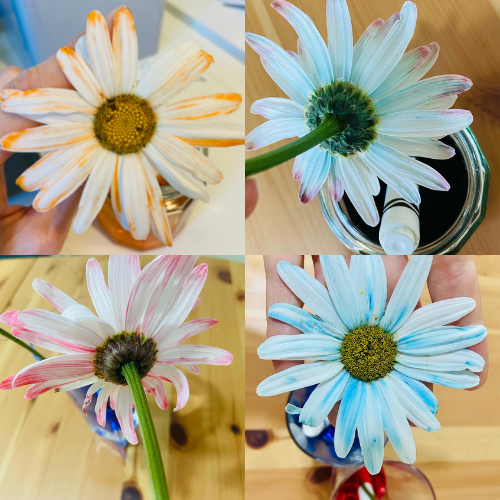
White chrysanthemums with fountain pen ink
I had heard on a Facebook group that fountain pen ink cartridges were a good choice for water transport experiments. This time I chose white chrysanthemums as they were the cheapest white flower at my local supermarket.
The first hurdle was getting the ink out of the plastic cartridge. I probably should have found a way to just pop out the little ball at the bottom but instead, I used scissors! This was a mistake and I ended up with purple hands…
Once a full, standard cartridge of ink was in the glass, I added an inch of water and left it overnight. You can see the results below:
VERDICT: Make sure clothing is suitably protected. This gave subtle candy-striped results.
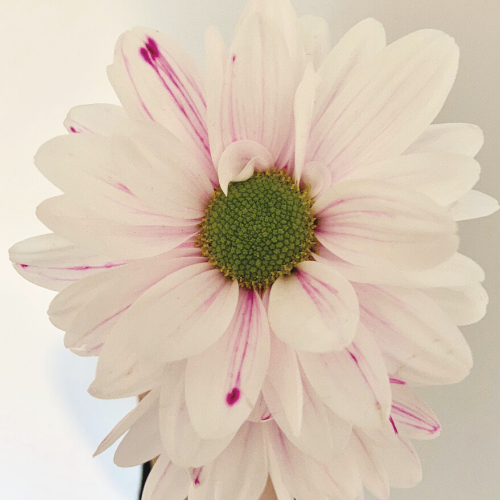
White chrysanthemums with crushed felt-tip pen.
I had chrysanthemums left over so for the third set-up, I tried something I’d heard about in a Facebook group – the insides of coloring pens!
For this, you need to break open the plastic casing and extract the colored stick in the middle. It may be wrapped in plastic so cut that off. I used black and green for my set-up. I mixed the fibers into an inch or so of water. The flower in the black water began to change color within the hour but as with the others, I left them overnight.
VERDICT: This was a little messy and I broke a pair of scissors trying to get the plastic casing of the pens open. The pens were washable though, so clean-up was easy. This was the most dramatic result of the three I tried.
Tip: If you’re going to try this, don’t waste new pens. Save pens that are running out of ink and use those instead.
Tip: I found the most dramatic colors to be black, blue and red. Green gave the least change.
If you want to read more, check out my post on the water transport experiment with celery.
Want to join my email list?
Grab this free sunflower life cycle template and get a weekly dose of science inspiration in your inbox. Just fill out your name and email below to join!