Don’t pass up an opportunity for hands-on learning in science! Studying owl pellets and their contents can provide a tangible way for children to learn about predator/prey relationships, habitats, skeletons, adaptations, and more. They’ll also develop scientific inquiry skills as well as having a ton of fun!
If you haven’t explored owl pellets in the classroom before, it might seem daunting but don’t worry. In this blog post, I’ll give you my top tips for investigating owl pellets in science lessons.
What are owl pellets?
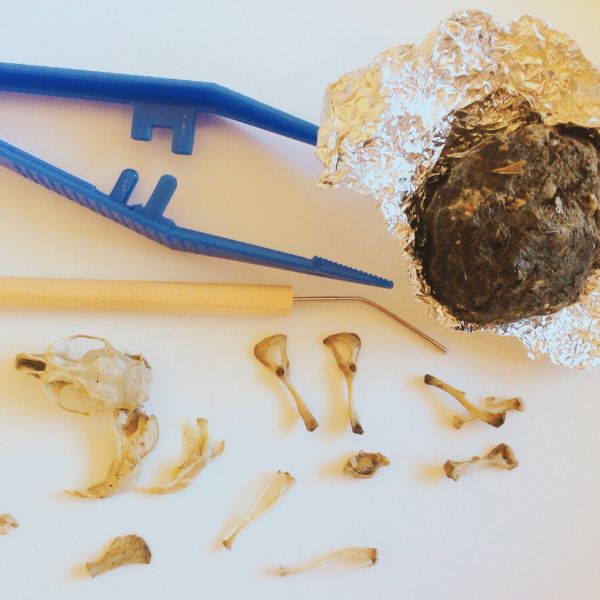
Owl pellets are the undigested remains of prey animals that have been ejected from the owl’s body from the mouth. They are not poop and generally do not smell bad!
Owls consume prey including small mammals, whole. When the prey reaches the first stomach, digestive juices break down the soft tissue. The partially digested remains then enter a second stomach. Here, the indigestible parts are compacted into a sausage-shaped pellet, which hours later, is pushed up and out of the beak! An owl usually produces 1-2 pellets a day.
Safety considerations when working with owl pellets
When writing your risk assessment for investigating owl pellets, there are a few things you’ll want to consider. This list is not exclusive and you should of course consult your local/national science advisory service.
• If you are purchasing owl pellets from a supplier, they are likely to have been sterilized in advance (usually heated in a a hot oven). If in doubt, ask your supplier for details.
• Consider disposable gloves.
• In your safety briefing, remind children to keep their hands away from their faces. This includes not eating or drinking whilst completing the investigation.
• Be aware of any fur/feather allergies.
• Ensure all tables and equipment are thoroughly cleaned with an anti-bacterial cleaner afterward.
Useful equipment for dissecting owl pellets in the classroom
• Tweezers
• Cocktail sticks/bamboo toothpicks
• Paper towels/napkins (if dissecting the pellets wet)
• Magnifying glasses/microscopes
• Bones chart/prey identification materials
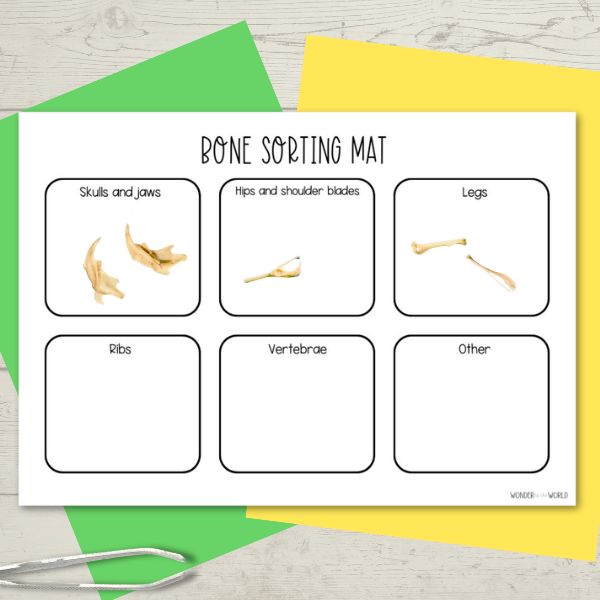
• Bone sorting mat
Steps to dissecting an owl pellet
1. Start by providing students with an owl pellet and tools. If you don’t have enough pellets for one each, working in pairs is fine and allows for discussion about their finds.
2. Encourage students to observe the pellet and note its size, shape, and any external features.
3. Begin the dissection process by carefully breaking the pellet apart using the tools provided. Remind students to work slowly and gently to avoid damaging any delicate bones.
4. As students uncover the contents of the pellet, instruct them to separate the bones and fur/feathers into different piles.
5. Using the provided reference materials or online resources, students can start identifying the bones they have uncovered. The use of a bone chart or guidebook can be helpful for this.
6. Once the bones have been identified, students can reconstruct the skeletons of the prey animals and determine the species consumed by the owl. By looking at how many bones of a particular type there are, they can determine how many individual prey animals the owl consumed.
To help with the sorting process, you can grab a free PDF sorting mat to print below.
Identifying the prey found in owl pellets
Identifying the prey found in owl pellets can be a challenging but rewarding task for students. It requires careful observation, attention to detail, and the use of reference materials. Here are some tips to help with the identification process:
-Sort the bones into different groups based on their characteristics, such as size and shape.
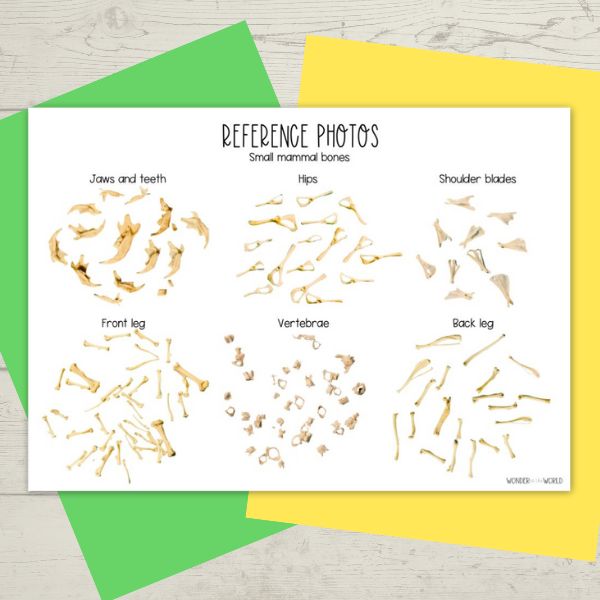
-Use a bone chart or reference guide to compare the bones to known species. You can grab a free page of reference photos for small mammal bones below.
-Look for distinctive features on the bones, such as teeth, claws, or unique shapes that can help narrow down the identification.
-Consider the size of the bones and the overall size of the prey animal to further narrow down the possibilities.
-Discuss and collaborate with classmates to share observations and insights, as different individuals may notice different details.
Through this process of identification, students can gain a deeper understanding of the owl’s diet and the diversity of prey species within its ecosystem.
Incorporating owl pellets into the curriculum
Food chains and webs: Use the information gathered from dissecting owl pellets to create food chains and webs. Students can explore the relationships between predators, prey, and producers in an ecosystem.
Biodiversity and habitats: Have students research and compare the prey species found in different owl pellets. Discuss the concept of biodiversity and its importance in maintaining healthy ecosystems.
Art and creativity: Children can draw the bones from the pellets as a way of recording their finds. I’ve also seen bones be cleaned with a hydrogen peroxide mix so they are white, and used to make mandalas!
Writing and communication: Have students write reports or create presentations summarizing their findings from the owl pellet dissections. This helps develop their scientific communication skills.
Skeletons: Looking at real bones provides an opportunity to compare and contrast with the skeletons of other species. Students may also observe similarities to their own skeletons!
Adaptation. Explore the adaptations of both predators and prey within an ecosystem.
Resources for obtaining owl pellets and related materials
Obtaining owl pellets and related materials for classroom use can be done through various sources. Here are some options to consider:
Educational suppliers: Some educational suppliers offer owl pellets that have been sterilized and prepared specifically for classroom use. These pellets often come with additional resources such as bone charts and lesson plans.
Local nature or wildlife rehabilitation centres: Contact local nature or wildlife rehabilitation centres to inquire if they have owl pellets available for educational purposes. These organisations may also be willing to offer guidance on where to find them.
Ebay: You can buy all sorts on eBay, including owl pellets!
Final top tips
-If your owl pellets are hard and compact, soak them for around 30 mins prior to dissecting them.
Students are unlikely to find complete skeletons. Fragile bones like ribs may not survive.
-Clean bones with a hydrogen peroxide solution after dissection to create a reference set of bones for next time!
Conclusion: The value of hands-on learning with owl pellets
In conclusion, incorporating owl pellets into the classroom curriculum offers a wealth of educational opportunities. By dissecting owl pellets, students engage in a blend of environmental science, anatomy, and ecology. They gain insights into owl species, their prey, and the intricate web of life in their ecosystems.
Owl pellets ignite curiosity, encourage critical thinking, and foster a deeper appreciation for the natural world. Through the use of owl pellets, students develop essential scientific skills such as observation, data analysis, and identification.
If you’re using owl pellets as part of a wider unit or topic on owls, check out my owl resources on TPT.
