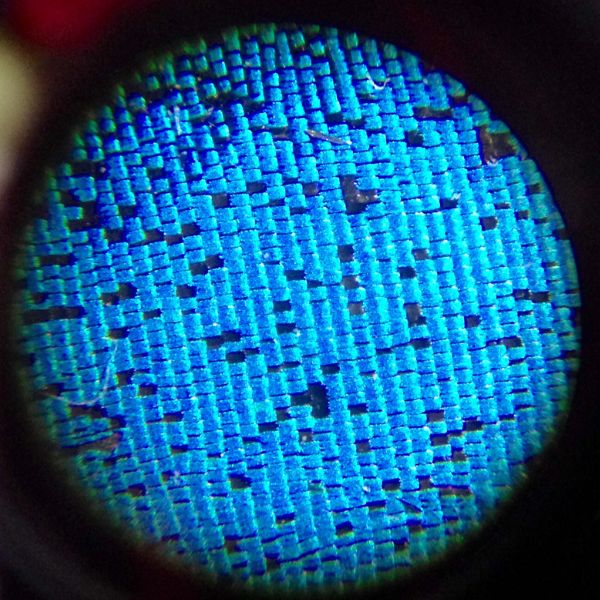
One thing I’ve noticed over years of teaching natural science is that children can’t get enough of looking at things under microscopes! When I was running science workshops in schools, I came up with the idea of using a laminator to create simple and ethical microscope slides which weren’t going to shatter or break. It also allowed children to get up close to things that would ordinarily be too delicate to handle.
In this blog post, I’ve got some tips for making budget and child-friendly microscope slides for science that you can used again and again. If you prefer, I’ve also linked to a YouTube video where I explain the process. Be warned, it’s probably not for the squeamish!
Note: This post contains some affiliate links. As an Amazon Associate, I earn from qualifying purchases.

What can you put in a laminated microscope slide?
For my microscope slides, I have used all sorts of things! Small, flat items work best – leaves, parts of flowers (you could press beforehand if you wanted to), animal hair, and insect wings are all good options. Aim for objects that are relatively dry as they’ll last longer inside the laminate.
Here in the UK, I have used The Ethical Butterfly Company who collect and sell wings from captive tropical butterflies (from butterfly houses) that have died of natural causes. You may find something similar in your own country.
Don’t forget you can also use parts of plants. I have laminated the anthers of a daffodil before as well as a delicate leaf skeleton!

Where can I find things to use to make slides?
During the warmer months, you may find deceased insects around your home, garden or school – these are ideal for home-made microscope slides if you don’t mind taking the parts you need from the bug. I once extracted the legs from a huge, dead house spider which for an arachnophobe was pretty scary!! However, the excitement so seeing kids examine the hairy legs under a microscope for a Halloween science workshop was worth the terror!
Once friends knew I was looking for insect parts to laminate, I had all sorts of interesting things given to me!
I never kill insects to make microscope slides – there are lots of ethical options so there is no need to.
Will it break my laminator?
I was willing to try this idea as I had a cheap laminator that I wasn’t precious about. If your laminator cost big bucks, or is temperamental, you may wish to use something else! Only laminating very flat things will minimise the risk. I once tried to laminate a beetle carapace (outer wing case)…it was not a success.
In short, use at your own risk.
What size laminates are best to use?
Credit card sized laminating sheets are great. They won’t require any trimming or cutting, and they have nice child-friendly round corners.
These are some you could consider:
- Safe for use with most household cleaners*
- 2.3 in x 3.7, Business Card Size 100 per package, 5 Mil thickness
- Ideal for protecting items from damage Delivers a clear, professional and photo-safe finish
- Protects and adds professionalism to business documents
- Great for business cards, library cards, insurance cards, and more
- 100 Pack with Loop Enough Quantity:100 Sets sufficient quantity and practical features can easily meet your daily use needs and replacement needs, you can also share with your family and neighbors.They sealed quickly and completely. Made labels using card stock and sealed them with the laminator and it was effortless. That the loops were included.
How long will the slides last for?
I’ve had slides that have lasted years (and are still going), and others not quite as long. I think the key is to avoid moisture (e.g. very fresh leaves).
The video
If you’d like to see the whole process from start to finish, here’s a short video I made a couple of years ago that talks through the steps.
Sign up for emails
Want to join my mailing list where I share my latest posts, tips, and science resources for kids? You’ll also get a cute sunflower life cycle freebie. Sign up here.
If you’ve got any questions, you can also find me on Facebook, Pinterest and Instagram.


